Home > Camino De Santiago Guide > Foot Care and Blister Prevention
Foot Care and Blister Prevention When Hiking the Camino De Santiago
Some of my links may be affiliate links. If you make a purchase, I might earn a small commission at no cost to you. See our Privacy Policy for details. And this post was crafted with care and occasional typos by Colleen (and not AI)
When I first walked the Camino de Santiago, I visited a specialist sports shop in Bordeaux, where they kitted me out with sturdy boots, a huge 60L backpack, thick wool socks, and plenty of advice. And sent me on my way.
The problem was that by Pamplona, my feet were in trouble. I limped over Alto de Perdon, cried on route to Puente la Reina, and finally took a taxi from Lorca to Estella as I couldn’t face putting my boots back on.
At a medical centre in Estella, they lanced my blisters, warned me how serious blisters can be, and showed me how to care for them. Then, I found a shoe shop, where they fitted me with new appropriate hiking shoes. I sent old boots and unnecessary gear ahead to Santiago to lighten my load, and four weeks later, I walked into Santiago de Compostela with happy feet.
Blisters are no fun. Over the years, I’ve learned so much about blister prevention whilst hiking the Camino so read on, and I’ll share what I know.

Why Do You Get Blisters When Walking the Camino?
It’s funny how we spend weeks training, preparing, asking questions, and buying gear and yet, it’s a simple blister that is most likely going to stop you from walking.
But how come we train in our gear at home, and all is well but as soon as we hit the trail, blisters form? There are many reasons:
I’m sure there are more reasons, but you get the gist! Blisters are the bane of a pilgrim’s life. They’re the second or third topic of conversation in every café and albergue ; Where are you from? Why are you walking? How are your feet?
But prevention is worth a bucket-load of cure, so what can you do to avoid getting blisters in the first place?

How Are Blisters Actually Formed?
Knowledge is power. There was a time when I thought I’d have to stop hiking, or maybe lose my little toes; I did actually google a toe-ectomy! I just couldn’t figure out how to solve my blister issues.
Then I found Rebekah.
I always thought blisters formed because my shoe rubbed against my skin and that the motion of skin against the shoe was the cause. Turns out, that’s not quite right.
But I’m not the expert. Take a look at this video. Rebekah Rushton is a podiatrist and blister expert, and her lessons have helped me prevent and manage blisters for over a decade.
Fair warning: there are a few images of blisters!

My Blister Prevention Routine: What Works for Me
Now that you know a little more about how blisters form, you need to know what you can do to prevent them. Over the years, I’ve tried countless methods, some worked, some didn’t.
I can’t replace expert opinion, and your blisters, just like Gerry’s, might be different from mine. But this is what I do, and it might help fellow sufferers like me, especially if you have wide feet.
Pre-Camino Daily Foot Care
If you dig deeper into Rebekah Rushton’s website, she talks about chronic shear and acute shear.
A bit of tough skin might protect your feet each day at home, but the biggest problem is if you get a blister underneath that hard skin, it’s going to be difficult to treat. That’s why I prefer to have no hard skin and stick to a good foot care routine.
And to clarify I don’t mean I want fresh, new delicate skin when I go hiking, but equally I don’t want patches of callouses either.
What I Do Before the Camino
Foot Care While Walking the Camino
I know exactly where my feet are prone to blisters and so I focus on this area. That’s not to say I can’t develop a hot spot elsewhere but on a daily basis I focus on my weak points.
I have really wide feet; seriously, they’re as wide as they are long and I could wear shoe boxes and they’d still be tight! Gerry, on the other hand, has narrow feet and he gets blisters in different places.
But we both use the same basic method of taping and foot care and here’s what works for me :
1. Follow the daily foot care route above : I always do this to ensure my feet are Camino-ready.
2. Engo Patches : I was skeptical at first because they’re not cheap, but once placed correctly, they last the lifetime of the shoe (mine did).
3. Wear the right shoes : I wear Altra Lone Peaks (in the Original fit) because they have a wide toe box and these are foot-shaped. My shoe may not be right for you, so spend some time researching and trying different shoes before hiking in them.
4. Choose the right socks : Don’t skimp on socks, they are as important as the right shoe. I’ve tried many, but I always return to my Drymax Ultralite hikers. They run a little small, so I size up. Gerry hates them and prefers Darn Tough socks instead. Many of the folks that walk with me swear by injinji toe socks too.
5. Tape key areas : I use preventative taping all the time. I use adhesive, slightly stretchy wound dressing and cut it to size
6. Gel toe protectors : These can help reduce friction and they do work for me, but they may not work for everyone. They are inexpensive so it’s worth trying.
7. Take breaks and let your feet breathe : Every 2 hours when we’re hiking we stop, take off our shoes, and let our feet breathe for a few minutes. Some people say, If I take my shoes off, I won’t get them back on! and if that’s the case then it’s a problem for you. You should be able to take your shoes off and wiggle those toes and your feet should feel happier for it.
Top Tip : I always carry a clean dry pair of socks in my pack too. If my sock is damp or dirty I switch it out.
When I pause and take my shoes off, I see sympathetic glances from other pilgrims, Oh, that poor woman, look at all those bandages! It might sound like a lot of effort but it’s really not.
I tape my little toes each day after my shower, I also have a good look and feel around to make sure all feels ok. Sometimes the tape stays on and I leave it, unless I have a blister than needs care. I cut the other strips for my big toe and the side of my foot at the same time. In the morning, I just I pop them on before my socks. It takes a minutes.
Top Tip : Do tape your little toes at night after your shower because for some unknown reason my arms always feel shorter in the mornings!

When To Take Action with Your Feet
Can you tell if you’re starting to get a blister? Not always, but often, you’ll notice a small change, maybe you’ll get a sense of a tingling or a rubbing sensation or even a slight warmth.
Learn to recognise that sensation. As soon as something feels amiss, stop and take action, even if it only seems minor. It’s a hotspot and it means a blister could well be in its way.
Learn more about hotspots here: Blister Prevention: Pre-Blister Hot Spots
Top Tip: A grain of sand can irritate your foot, or make you change how you walk, or cause a blister. If something feels different inside your shoe, stop and sort it out immediately. It takes seconds to fix but can save you days of pain.

My Camino Blister Kit : What I Take in my Pack?
Over the years, I’ve learned what works for me. It won’t be the same for everyone, so listen to your feet and experiment with what works for you.
It’s also important to remember that along the Camino, pharmacists are well used to treating blisters. Your first aid kit needs to be just that; first aid. You don’t need a suitcase full of supplies, just enough to get you to a doctor or pharmacy if needed.
That said, here are the essentials I always carry but I take just a few of each item and not the entire box :
I keep all my First Aid supplies together in clear, zippered pouches to keep things organised, secure, and easy to find. Everything then goes into a drysack. I do this every time I go hiking and I always know where things are.
And the drybag means that no matter the weather, it stays dry.
Want to learn more about the Camino? Then hop over to my Free Private Facebook Group | Walking The Camino De Santiago.

Blister Care on the Camino: What If I Get One?
Even with the best prevention strategies, blisters can still happen. So what should you do? The priority is to keep an open blister clean, help it heal quickly, and stop it from getting worse.
When I first walked the Camino, my blisters were lanced at a medical centre, and I was given a cleaning routine. They also told me to stop walking until they dried.
When I first walked the Camino, on the advice of the doctor I stopped for two days in Estella and then had two short walking days before moving on. I hated doing it. I didn’t want to lose my Camino family. But that short break saved my Camino and in the end, that’s what mattered.
If you have a bad blister, my best advice is seek professional help. Don’t rely on your walking buddy, don’t rely on my blog, and don’t rely on random advice from strangers. Go to a pharmacy or a medical centre and seek professional guidance.
Top Tip : If you have a blister, consider using a backpack/luggage transfer service; it will take some of the pressure off your feet.

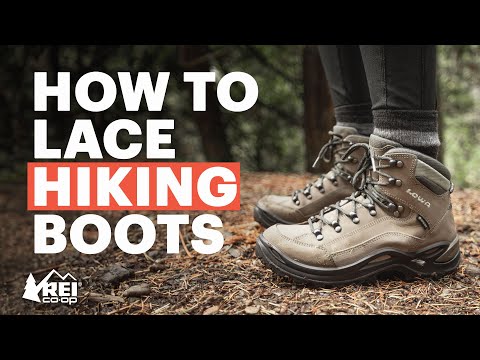
Lacing Technics to Help Prevent Blisters When Hiking
Again, when I first walked I had no idea that you could lace a shoe differently and how it could have helped with my foot pain and with blister prevention.
My first lightweight shoe, sold to me in Estella, was a Salomon Ultra GTX trail shoe. It was a cross between the traditional hiking boot and a trail runner. I loved that shoe. I loved the quick lacing system but it did mean I couldn’t follow any of this great advice.
Sadly my foot has become even more wide since then and I switched to Altra Lone Peaks; but I do use these lacing techniques to help my feet on different trails.
Likewise Gerry often pulls his laces too tight, as he has a narrow foot, but this can lead to discomfort. However, these days, he’s learned about lacing and can lock his foot in place without having to squeeze his laces too tight.
1. High Arches or Top-of-Foot Pain? Try Parallel Lacing or Box Lacing
If you experience pressure on the top of your foot, especially from high arches, parallel lacing (also called box lacing) can relieve discomfort.
How It Works: Instead of crisscrossing the laces over the top of your foot, you run them straight across each row of eyelets and only cross them on the sides. This keeps the pressure off the top of your foot while still securing the shoe. This works for :
2. Swollen Feet? Use Window Lacing (Skip Eyelets in Pressure Zones)
Feet naturally swell on the Camino, especially in hot weather or after long days of walking. If your shoes feel too tight by the afternoon, you can adjust your lacing to create a “window” over swollen areas.
How It Works: Identify where the pressure is (usually the midfoot) and skip one or two eyelets in that area to create more space. Once you’ve skipped, resume normal lacing further up the shoe. You may find a surgeons knot will lock the laces in place and prevent loosening or slipping. This works for :
3. Heel Slipping? Use a Runner’s Loop for Extra Security
Many shoes have an extra lace hole but it’s rarely used correctly. Using this alongside different lacing and a surgeons knot can really help prevent heel slips.
How It Works: Lace normally until the second-to-last eyelet. Tie a surgeons knot and then continue lacing. Find the extra lace hole and thread through, also using a surgeon’s knot. Watch the video below for a better explanation! This works for :
Top Tip : If you’d like a more visual look at the techniques, this is a very useful post from Asics, explaining the different ways you can lace your shoe.
As I’ve probably already said, there is no one size fits all solution but try different techniques before your start your Camino. The right lacing method can really help prevent blisters and foot pain.
Remember that your feet will change as you walk, especially at the end of a long hot day. I will also change my lacing if I’m about to make a steep descent; just as you lengthen your hiking poles, so you should adjust your shoe.

My Final Thoughts Blister Prevention When Hiking the Camino
I see a considerable amount of well-intended advice online. The problem is that we can all only talk from our own experience. My advice may not be right for you and a blister, especially an infected one, is a matter for a medical professional, not Facebook.
I have despaired over my blisters. I may joke about them now, but there was a time when I genuinely thought I’d have to find another hobby. Then, I educated myself.
What I’ve learned about blister prevention :
Blisters Don’t Have to Ruin Your Camino! Prevention is key. If you start learning about blisters alongside your training routine you’ll be better placed to deal with them.
Be your own advocate. Look after your feet. Treat them well, and they’ll carry you for a thousand kilometres and more. And I should know!
Want to learn more about the Camino? Then hop over to my Free Private Facebook Group | Walking The Camino De Santiago.

Are You Walking the Camino De Santiago?
You may have noticed that I love the Camino. I’ve walked countless times since 2013. If you’re planning your own walk I have many other resources that can help :
Along with many other posts covering travel, insurance and currency, travel to St Jean Pied de Port and What to do in Santiago and pilgrim guides to Porto! I have a lot of great content for pilgrims!
If you’re planning your Camino or already on the trail, I’d love to hear about your experiences! Join my Camino Facebook Community, share your stories, and or ask questions and find inspiration for the road ahead.
Don’t Forget Travel Insurance
Whenever you travel, you should have great travel and medical insurance. None of us expect anything bad to happen, but in the event of an incident, you want to be sure that your insurance will cover you.
I’ve ended up in hospital in Peru, Indonesia, Portugal, Japan and Ireland. Every time my insurance took care of everything. I would never leave home without full and comprehensive insurance.
MondialCare : Due to increasing limitations, mainly due to age, we have recently switched to MondialCare for our travel insurance. We have taken an annual policy at a very reasonable cost that includes medical and other travel cover. There are no trip length limits and the upper age for cover is 84. For Camino walkers and travel in Europe they have a low cost Schengen policy with no age limit.
TrueTraveller : We have used this policy and were very happy with the cover, especially considering our ages and pre-existing conditions.
Globelink: We have used and recommended Globelink for years and not heard of any issues. They are a great choice for European and UK Residents.
Genki : This is an EU based company offering long term policies for nomads and travellers. Their monthly rates are very competitive for longer trips too.
Try Our Trip Planning Tools
Start here to find the best accommodation
Start here to find flights for your adventure
Start here to find the best sightseeing tours

Hey I’m Colleen. I’m married to Gerry, we’ve three fabulous kids and been living in France for almost two decades. I fell in love with Spain in the 1980s and I’ve walked 1000s of miles along the Camino de Santiago. Now we’re exploring and walking the world and I can’t wait to share what we’ve learned!